In this lesson we will show you how to start Booking Inspections & Appointments in Horizon.
1. Booking an Inspection
1) To book an inspection, click on the Scheduler.
2) Pick a date from the Calendar.
3) Choose an available time-slot to the right of your name and click Create Inspection.
Figure 1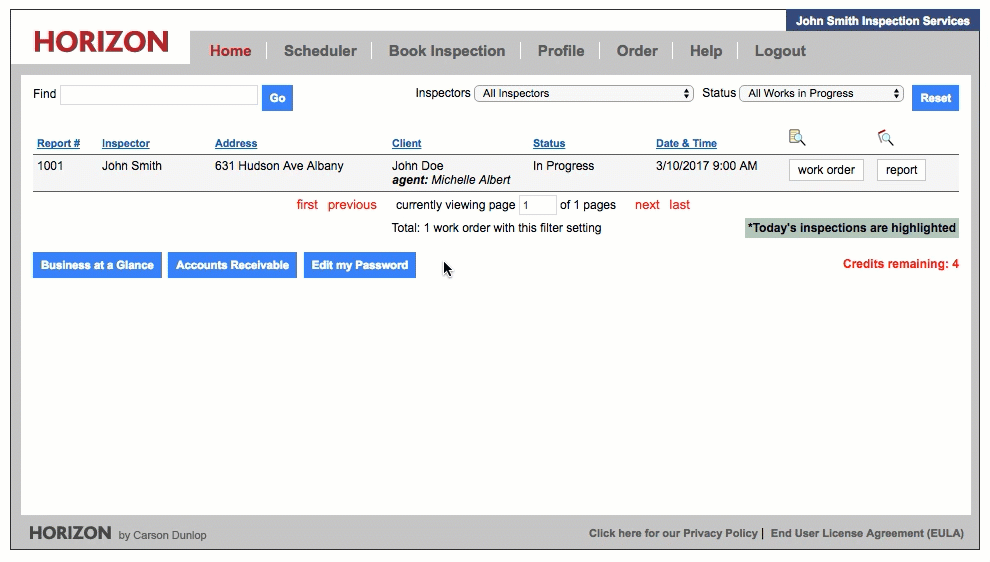
4) Fill in the details on the Book Inspection screen. Note: Fields marked with an asterisk (*) are required before clicking Next.
5) Click the Next button at the bottom of the screen.
Figure 2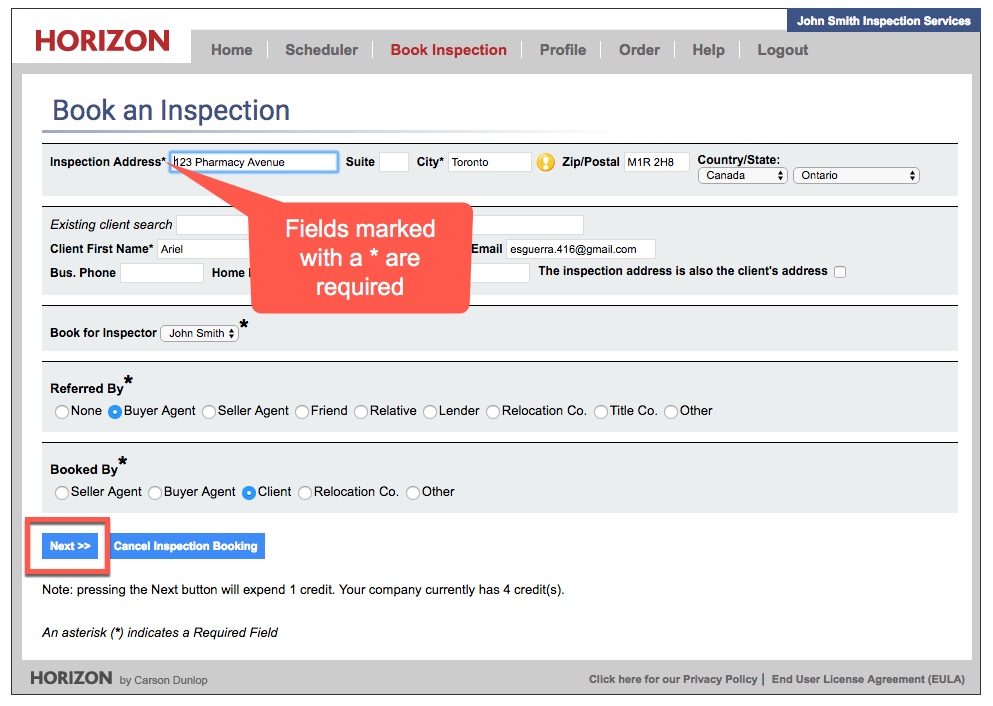
2. Creating an Appointment
Bonus Tip: Book an Appointment or Vacation
To Book an Appointment or Vacation Time, instead of clicking Create Inspection, click on Create Appointment. From this screen you can set it to run all day, and also repeat it for x amount of days. You can use the Details box to specify the nature of the appointment.
Figure 3

3. Filling out the Work Order
Once you book an inspection, you will be taken to the work order screen. This is where you will fill in the rest of the job details, and send your Contract electronically via email to your client. Upon the contract being signed, you are ready to start your inspection.
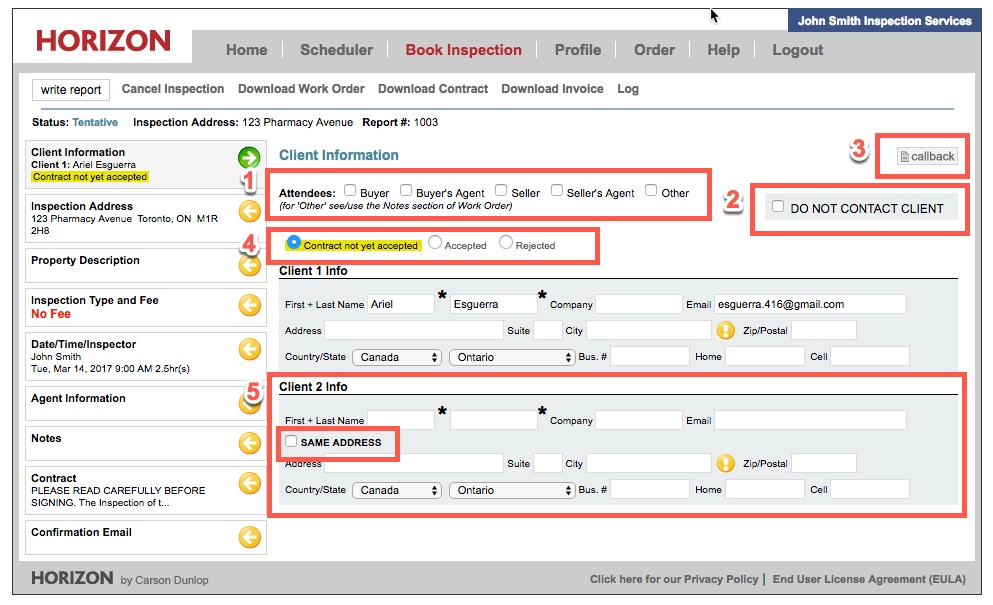
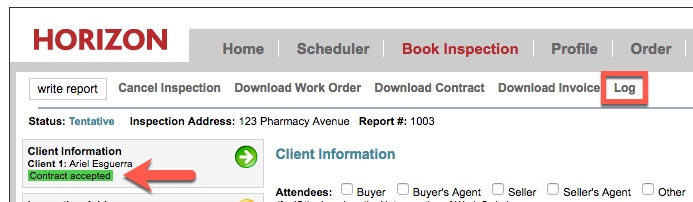
1) Across the top of the screen, there are 7 links by default: (Figure 1)
Figure 1
write report – Click this once you are ready to begin report writing on the Web, or before you sync to Horizon Mobile or Horizon Laptop
cancel inspection – This cancels the inspection
download work order – This creates a PDF of the work order
download contract – This creates a PDF of the contract
download invoice – This creates a PDF of the invoice
log – This creates a log of all the people who booked or revised the inspection, and when.
The goal of the work order is to fill in the client/property/agent details prior to the inspection report.
The first panel is client information. There are 5 main areas outlined here: (Figure 2)
1) Attendees - Select who will be attending the inspection.
2) DO NOT CONTACT CLIENT - Click this box if the clients do not wish to be contacted after the inspection.
3) Callbacks - Use this to log customer complaints.
4) Contract not yet accepted - Once the client accepts your contract via email, it will change to 'Accepted'.
5) Client 2 Info - Client 1 is already populated from when you booked the inspection. Fill in Client 2 with the spouse/partner information if needed, and click Same Address if applicable.
Figure 2
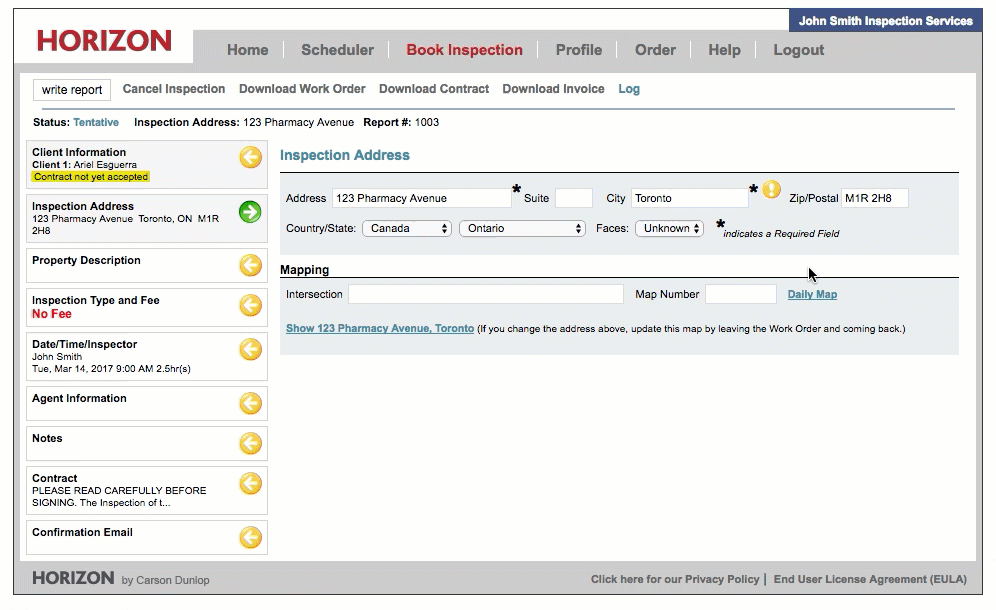
The second panel is Inspection Address. From here you can also add the direction which the house faces, and also view a map of your inspection. (Figure 3)
Figure 3
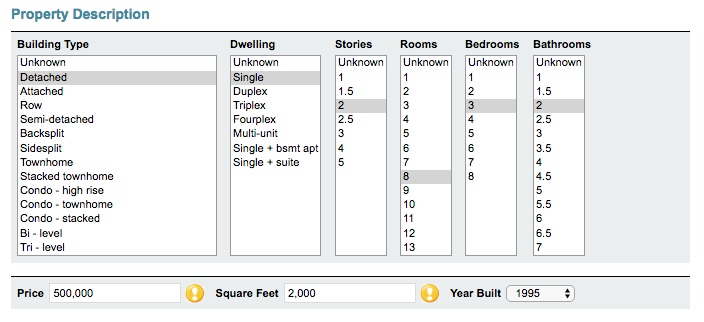
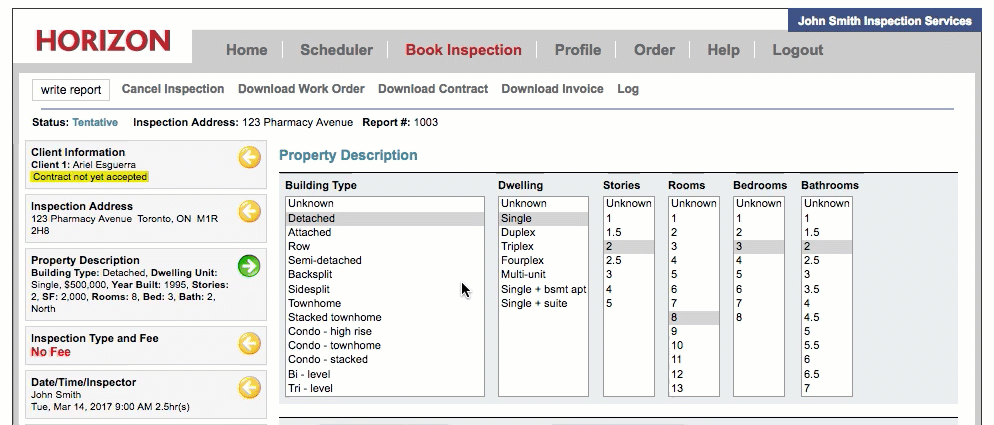
The third panel is Property Description. From here you can specify the following: (Figure 4)
Figure 4
The fourth panel is Inspection Type and Fee. We give you a list of standard Home Inspection Fees to start with. To set up customized fees, please refer back to this tutorial on Inspection fees and taxes. (Figure 5)
Figure 5
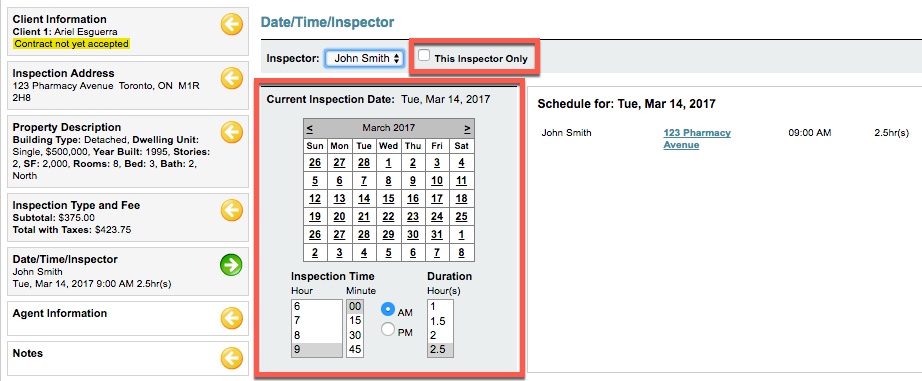
The fifth panel is Date/Time/Inspector. This screen is pretty straightforward. You can select 'This inspector only' if needed. You can also shift the date and time if the client wishes to move it to a different date. (Figure 6)
Figure 6
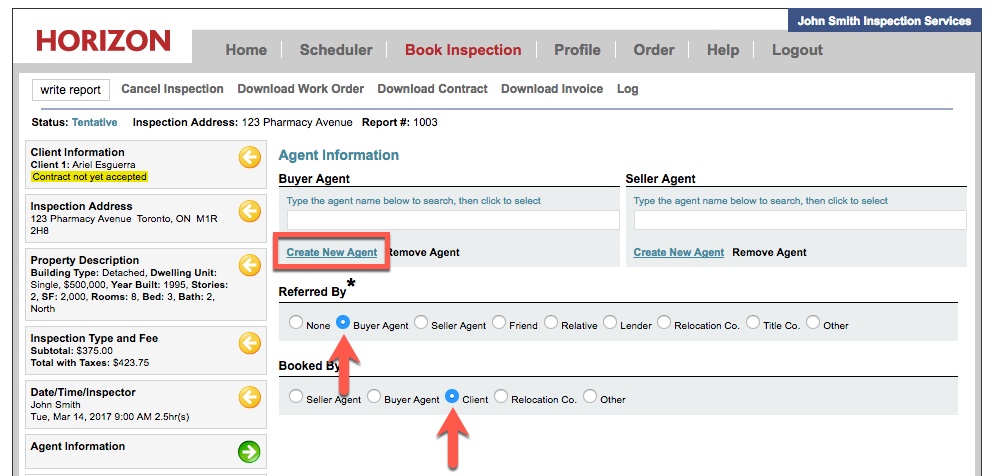
The sixth panel is Agent Information. You can search for an Agent if they are already part of your Agent database. You can also click 'Create New Agent' to add them to your database for future work orders.
From this screen you can also indicate who the inspection was Referred By & Booked By. (Figure 7)
Figure 7
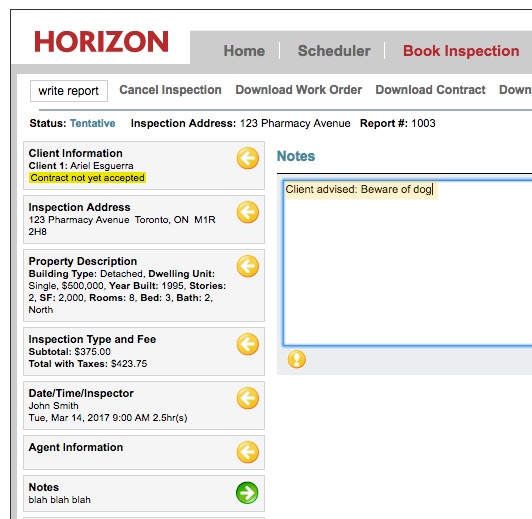
The seventh panel is Notes. You can also click on the (!) to insert your own common notes that you have created in the Text Options area of your Profile. (Figure 8)
Figure 8
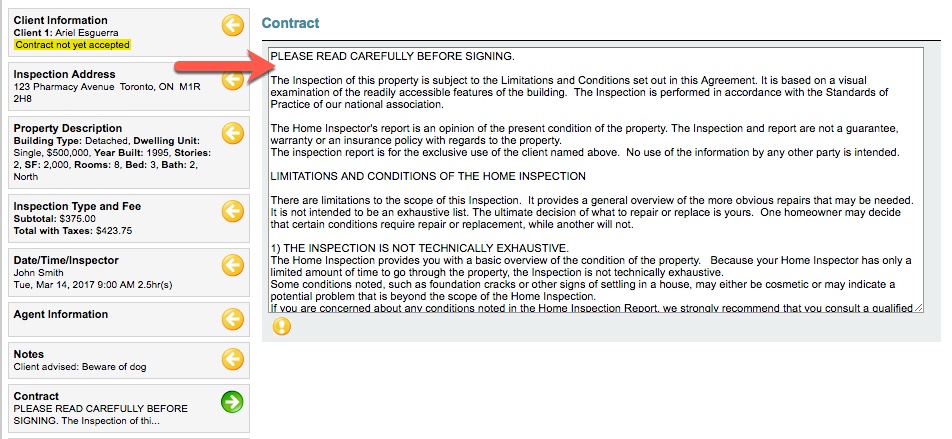
The eighth panel is your Contract. We supply you with default contract wording, however we do not advise to use this contract or any contract without receiving qualified legal advice. (Figure 9)
For more information on how to permanently add your own contract, please refer to our Contract Tutorial here.
Figure 9
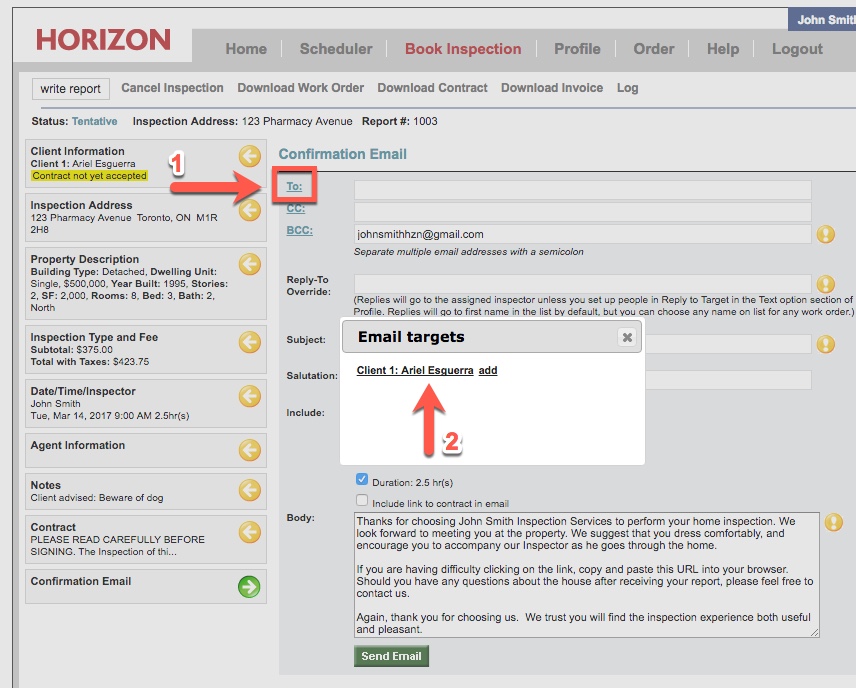
The ninth panel is your Confirmation Email. First, click on the To button. Then click on the Client 1 name from the middle of the screen. This will save you time by inserting your client's email into the box so that you don't have to manually re-type it.
You can also add Client 2 email using this method and also CC your Agent's as well. (Figure 10)
Figure 10
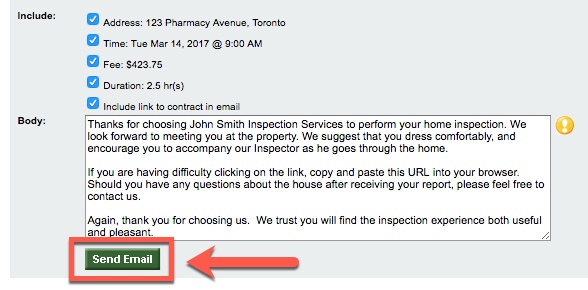
Select everything under the Include options that you require. Also, change the Body text if it needs to be altered on-the-fly.
Once you are ready, click 'Send Email'. (Figure 11)
Figure 11
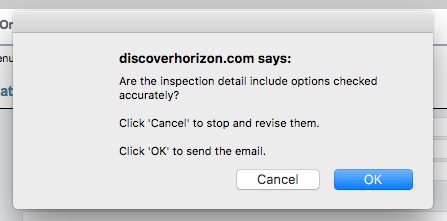
You will see the following prompt. Click OK. (Figure 12)
Figure 12
The Log of Emails will show you a timestamp of when the confirmation email was sent. (Figure 13)
Figure 13

Once your client accepts the contract via email, the flag in the work order for contract accepted will change from yellow to green. (Figure 14)
Figure 14
This article covers the work order screen.
If you have any questions, please feel free to contact us at 1-800-268-7070 ext. 259 or submit a support ticket.