What is it?
An alternative Inspection Report PDF to the Classic Horizon PDF. It allows for much more flexibility on the design of your Inspection Report, using the power of Horizon and Microsoft Word™. If you're happy with the Horizon PDF, nothing changes and you can continue to use the same report. If you're looking for a change, read on!
A few notes before getting started:
Our Tag set for Report Designer and how-to may be found here.
The Report Designer themes do not use the Classic PDF. This is considered an alternative design and does require the Inspector to have Microsoft Word™ and also the Windows 10 Operating System for PC. Our PDF conversion utility may be downloaded here:
Horizon DOCX to PDF Conversion Utility
Report Designer can also be used to collect data and photos in Horizon and output them to State-specific forms (4-Point, Wind-Mitigation, alternate Report Theme). Contact us directly to get set up with any of these forms. At time of launch (January 27th, 2019) we have:
- 4-Point Citizens
- Wind Mitigation
- Roof Condition Report
- Alternate Report Themes
How do you set up a standard Inspection Report template in Microsoft Word?
To choose one of our standard Report Themes:
1) Under Profile, go to 3. Report Config > Report Designer Config > Settings (Fig. 1)
Fig. 1

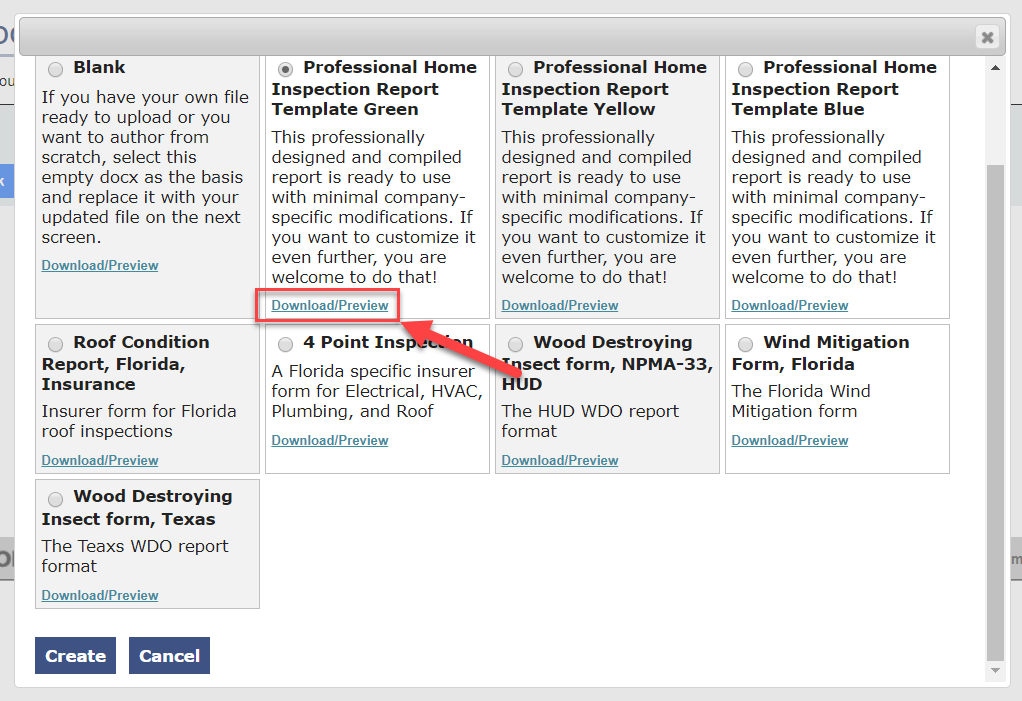
2) On the Report Designer Setup screen, click Create New Base Template.
3) In this example, we have chosen the template called (Professional Home Inspection Report Template Green) (Fig. 2)
Fig. 2
4) Once the Template has been downloaded, open it in Microsoft Word.
5) Click 'Enable Editing' at the top of the Word document. (Fig. 3)
Fig. 3

Note: The white panel on the right-hand side of the document is used as a guide only with hints and tips on using the base template. It does NOT show up in the final report once published.
Note: These templates use what are called 'TAGS' to pull in data from your work order and report. (E.g. DOCXTAG
6) The first thing you should do is insert your logo. Click Format at the top of the screen followed by Fill > Picture or texture Fill > File. (Fig. 4 & 5)
Fig. 4 & 5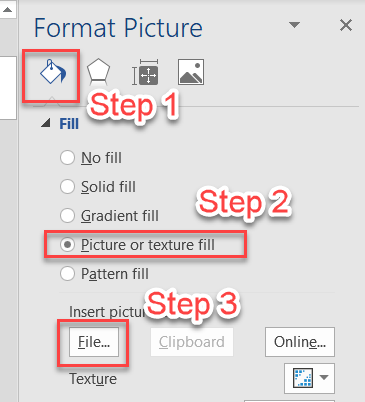

7) Once you have inserted your logo, re-size it as needed.
You can also insert the logo on your cover letter (optional)
8) Click your mouse above the tag called 'Dear DOCXTAG_ALLCLIENTNAMES,'.
9) Click Insert > Pictures to re-import your logo.
10) You may notice that the Table of Contents page numbers are inaccurate. These will be updated manually right before you upload the document.
11) Next is the Invoice and Contract. These are pulled in automatically based on what is set in your work order.
Note: Don't use an Invoice or Contracts as part of your final reports? These can easily be removed from the Base Template!
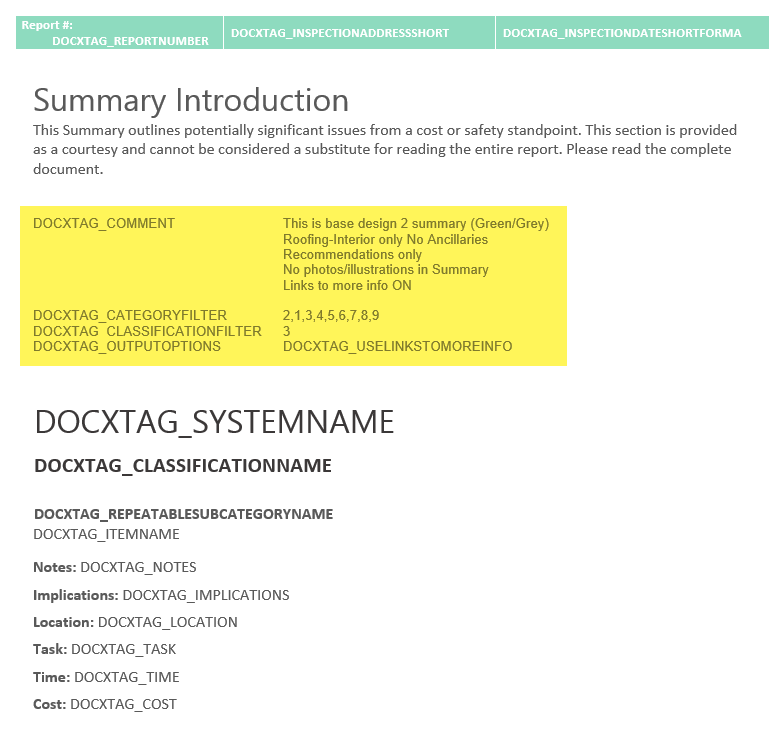
12) Up Next is the Summary section. You will notice that it does not use any Report data, but rather uses 'Filters' and 'Tags' to pull in content from your Horizon report. (Fig. 6)
Fig. 6
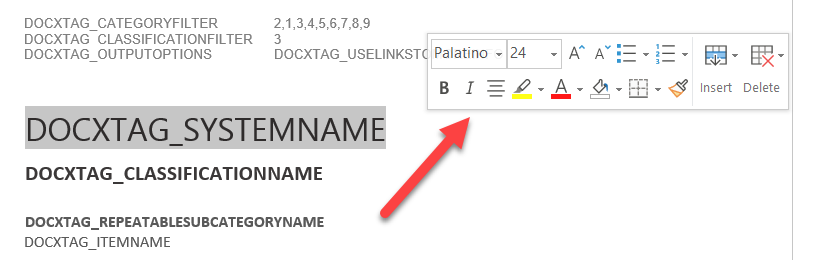
The Summary text can be changed directly on-screen if you wish. Please do not change the 'styles' in the Home screen panel. (Fig. 7).
Fig. 7

We recommend that you highlight the text if you wish to change the Font size/color/weight.
Fig. 8
13) This is immediately followed by the Main Report which also uses Filters and Tags.
Note: If you use any Ancillaries, please contact us before using a base template so that we can provide you with your Filter codes (For example 7246 is your Site Info tab).
14) At the end of your report is the Reference Library which has been redesigned. (Fig. 9)
Fig. 9

You can make many changes to your base template, however we have provided you with multiple templates that require minimal setup.
Remember, if you use any Ancillaries such as Site Info, Pool and Spa, Septic etc. please contact us after configuration of your base template so that we can add these to your document.
The next step is to upload the base template you have created. Save the document by clicking File > Save As in Microsoft Word.
Have any questions? Create a Create a Support Ticket and our support team will be glad to help you out!