Part 1 of the Article may be found here.
1) Go back to your Horizon Profile.
2) Under Section 3. Report Config, go to Report Designer Config > Settings.
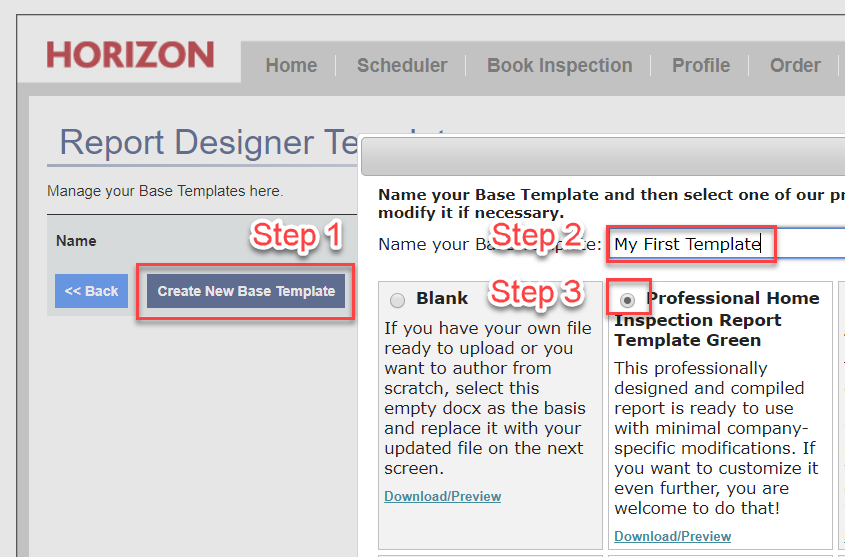
3) Click Create New Base Template. (Fig. 1)
4) Name your Base Template. (Fig. 1)
5) Select the base template that you would like to override. In this example I have chosen the Green template that was modified from Part 1. (Fig. 1)
Fig. 1
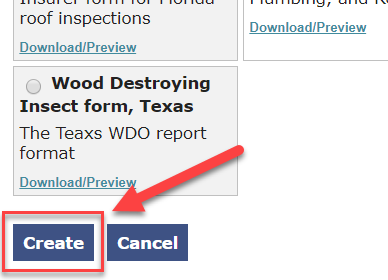
6) Click Create at the bottom of the screen (Fig. 2)
Fig. 2
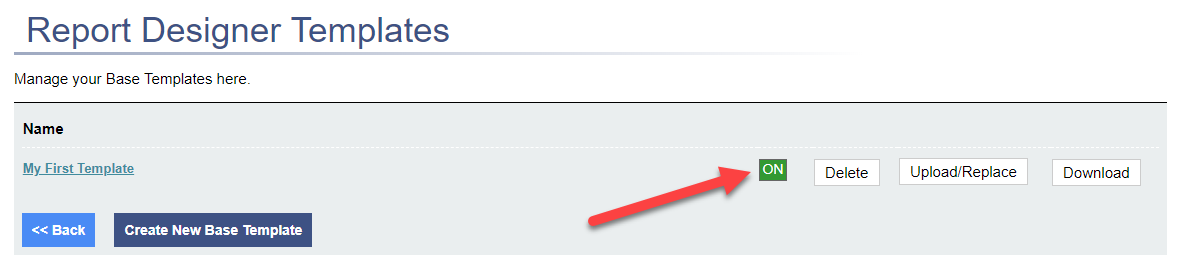
7) Your base template is now on and available to use! (Fig. 3)
Fig. 3
Using the base template is still completely optional at this point. You can still use the Classic PDF anytime. To stick with the Classic PDF, after you Generate, click Publish PDF right away and skip the Download/Upload process.
To use a Base Template in your Report, please see below:
Note: You should always Preview using the Classic PDF option. The Report Designer theme was designed for styling your document, such as creating line breaks, changing font size/color/weight, and inserting external Illustrations & Diagrams. Also note that if you use a Report Theme the Appendix would not be used. You can always insert external documents into the PDF before or after the Reference Library. For instructions on how to insert a PDF into a Word doc, click here.
8) Beside Choose Report Design, select your Base Template. In this example I have chosen 'My First Template'. (Fig. 4)
Fig. 4
Note: Once you do this remember the What to Include in Report options are no longer in effect. These settings are contained inside of your Base Template.
9) Click Generate. Once the Report has generated, click Download.
Fig. 5

10) Open your Report in Microsoft Word.
11) Edit the line breaks as needed. You can shift content down on the page easily to keep the content together! (Fig. 5)
Note: It's best practice to save your Word doc as you go. It's also best practice to try and limit your time spent in the base template to 15-20 minutes. The primary use of this tool is to be able to edit your line breaks, and possibly color and style the Font as well.
Fig. 5

12) You can also change the Font color, or add Bold/Italic/Underline text! (Fig. 6)
Fig. 6
13) Once you've made your changes, go back to the Table of Contents page.
14) Click on the Title for Table of Contents.
15) Click on 'Update Page Numbers only' (Fig. 7)
Fig. 7
16) Once you're done making your edits, make sure you save the document by clicking File > Save As.
17) Go back to the Report Publishing screen and click 'Upload edited document'. (Fig. 8)
18) Click on 'Convert to PDF'. (Fig. 8)
Fig. 8

19) Using our Horizon PDF Converter Utility, your Document will be converted to a PDF. Please note it does require Windows 10 and our Windows Store App which may be downloaded here. (Fig. 9)
Fig. 9
20) Click Publish PDF. If you do not see a Publish PDF button after the document has been converted, press F5 to refresh your screen.
Fig. 10

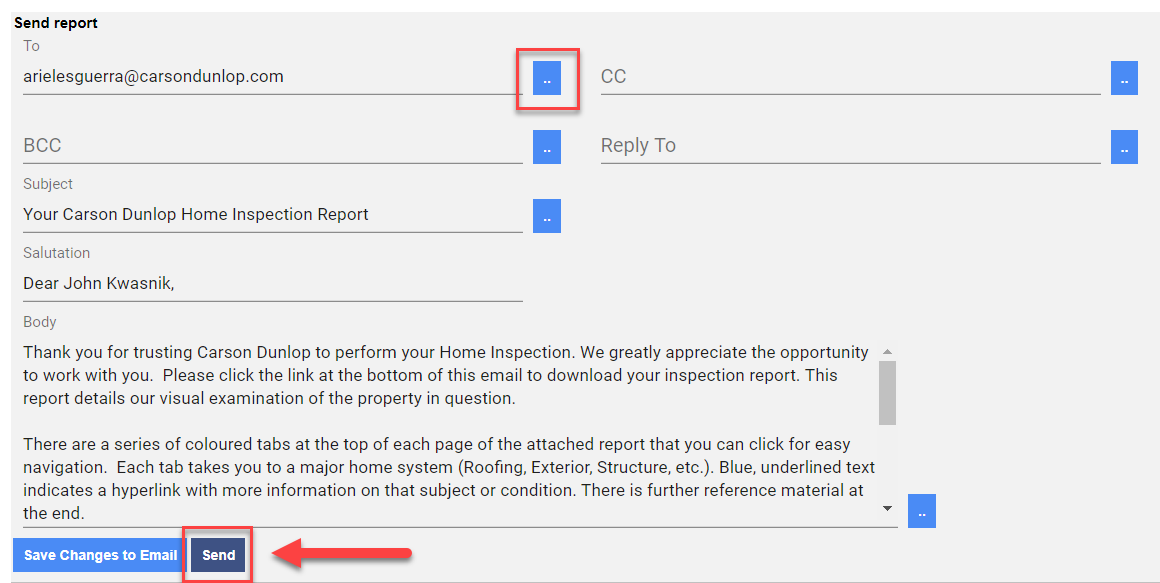
21) Add your Recipients and click Send. You're done! (Fig. 10)
Fig. 11
If you have any questions, please schedule a Free Report Designer consultation with us:
http://info.carsondunlop.com/meetings/horizon/reportdesignerconsultation